2005-12 PORSCHE BOXSTER |
||||||||||||||||||||||||||||||||||||||||||||||||||||||||||||||||||||||||||||||||||||||||||||||||||||||||||||||||||||||||||||||||||
|
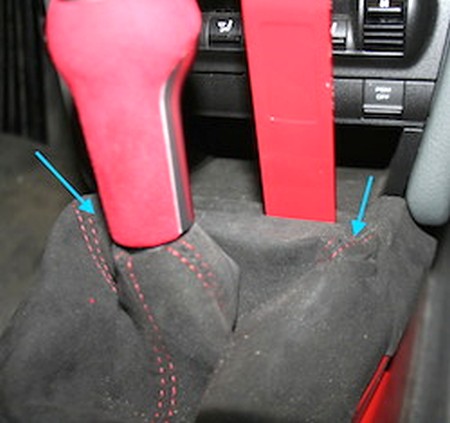
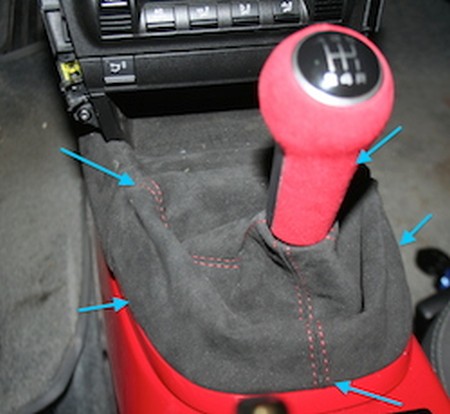
CENTER CONSOLE AND SHIFT BOOT |
 |
|
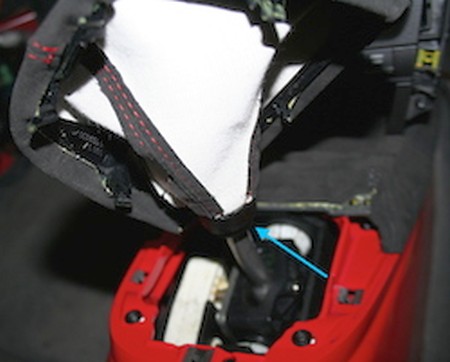
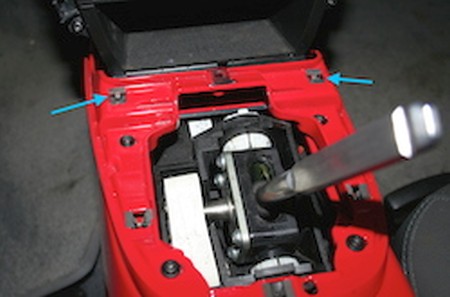
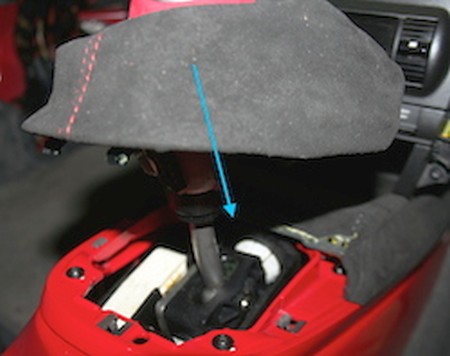
2. Pull the boot up, revealing a locking ring underneath the shifter. Turn the locking ring clockwise to unlock it. |
 |
|
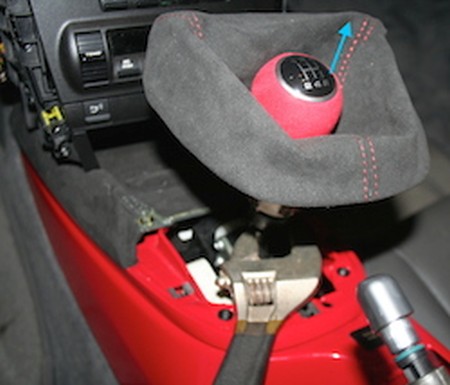
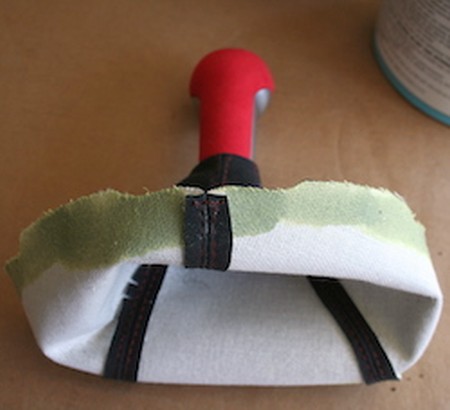
3. Pull the shift knob up to remove. It should slide easily. Remove the boot from the knob and lower ring and attach a new material to the knob. |
 |
|
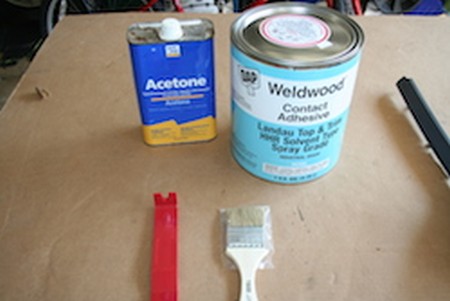
4. Apply glue to the lower ring and bottom of the boot (roll up the bottom of the boot). |
 |
|
5. To determine how far up the boot to go, first align the boot to the ring, wrap around the bottom and not where the glue would have to be to cover the ring. |
 |
|
6. Attach the boot to the ring and wrap it around the bottom. Use the blunt end of the trim removal tool to rub the material if necessary. |
 |
|
7. IF YOU ARE NOT INSTALLING THE CENTER CONSOLE COVER, SKIP TO STEP 13. |
 |
|
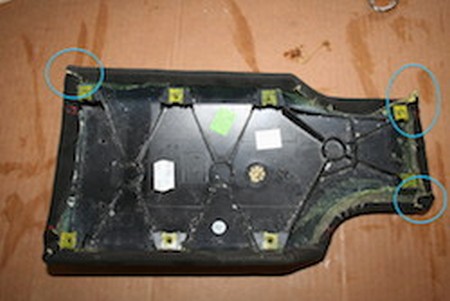
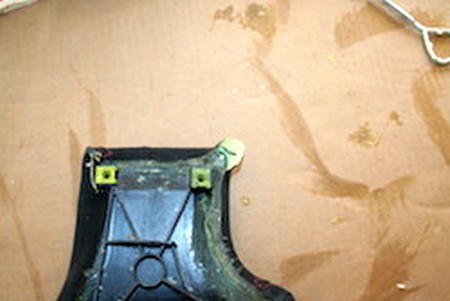
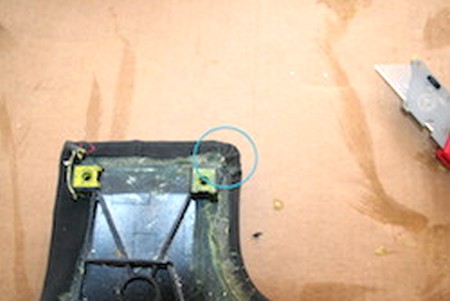
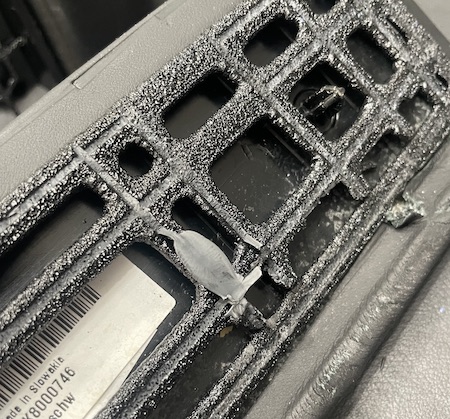
8. Wedge the trim tool between the shift gate cover and lower frame. It is help on by 2 clips on the front (Photo 5 shows clips). Be careful not to damage the lower frame. |
 |
|
9. Align the material to the shift gate cover and note how it folds around, etc. |
 |
|
10. Apply glue (following the manufacturer's instructions) to the shift gate cover and the material. Attach the material to the shift gate cover, aligning the seams. Then, wrap it around the sides, trimming (if needed). |
 |
|
11. Once dry, slide the shift gate cover on to the lower frame, snapping it down onto the 2 clips. |
 |
|
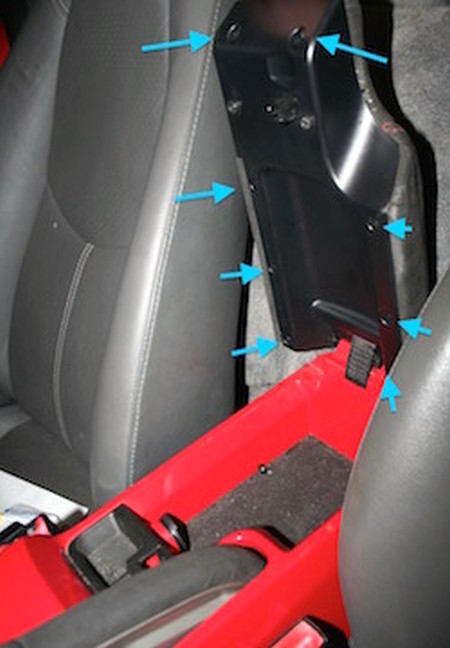
12. Reattach the vertical console side covers by pressing back on the 3 clips. |
 |
|
13. Slide the boot and knob over the shifter until it fully seats. Turn the locking ring counter clockwise to lock the knob into place. |
 |
|
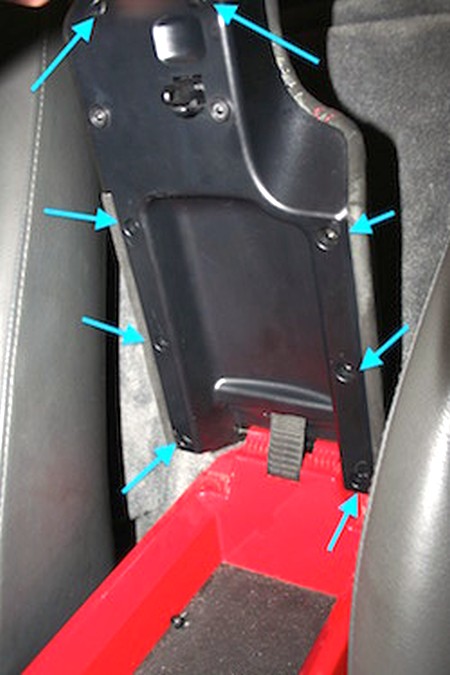
14. Snap the boot ring onto the 5 clips. |
 |
|
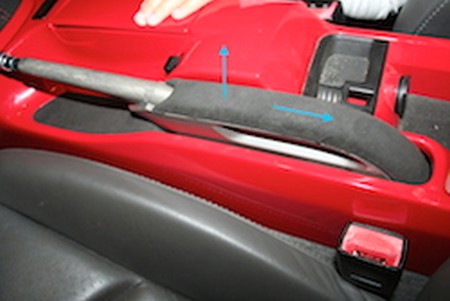
EBRAKE HANDLE COVER AND BOOT |
 |
|
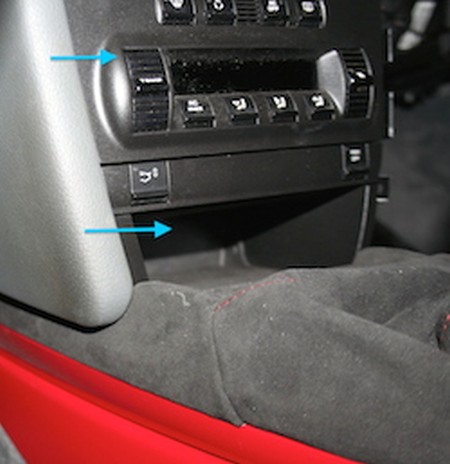
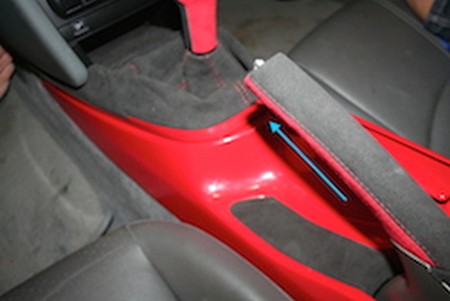
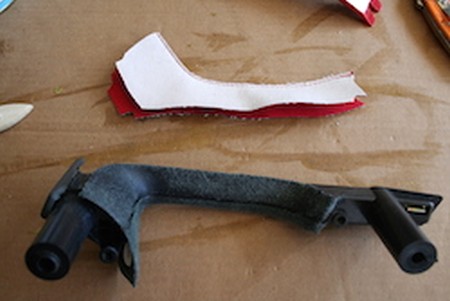
1. Remove the handle (blue arrow) from the brake by pulling the handle straight forward. The button will fall out, so be sure to keep an eye on it. |
 |
|
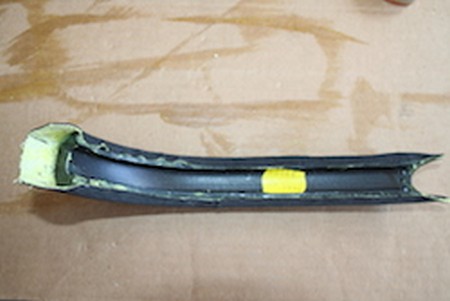
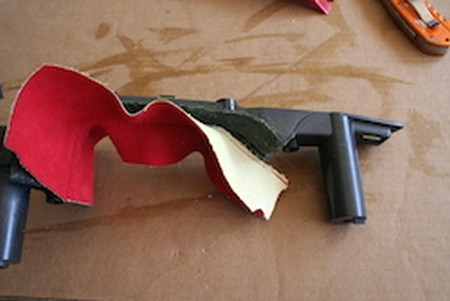
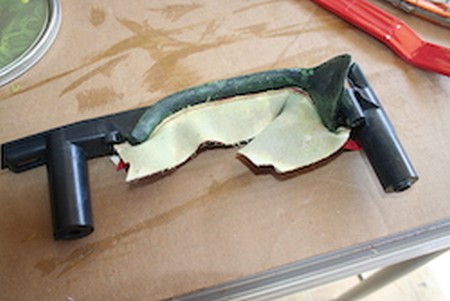
2. Remove the leather cover by peeling it backwards, cutting it off, or removing the stitches. Apply adhesive to both the material and the handle. Be sure to follow the manufacturer's instructions... avoid the temptation to attach the parts early, When dry, put the material on the handle, and roll the edges of the material around the ends. |
 |
|
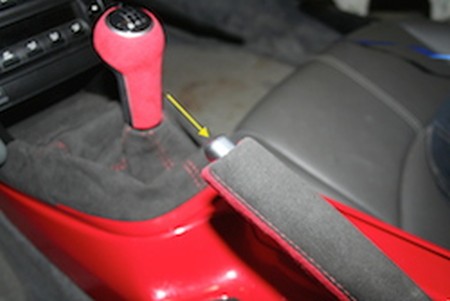
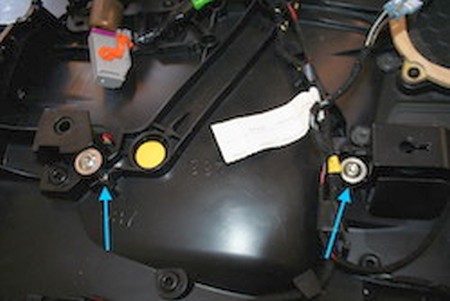
3. Slide the handle back on the brake (yellow arrow) until it goes in all the way. It may take a little force to seat completely |
 |
|
4. Slide the button into the end. |
 |
|
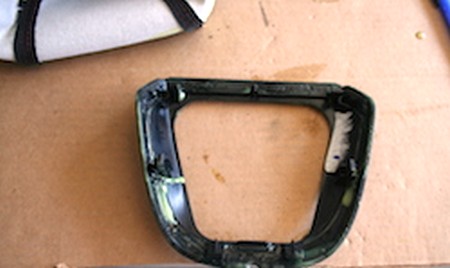
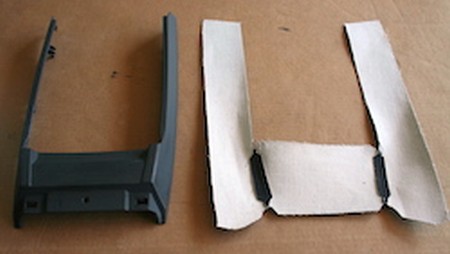
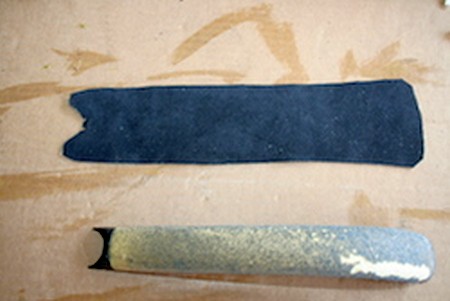
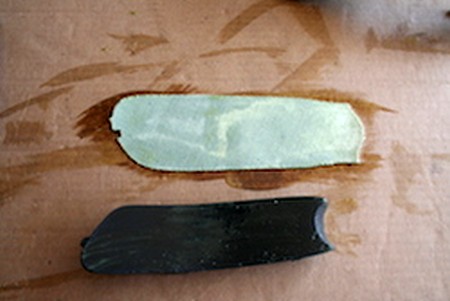
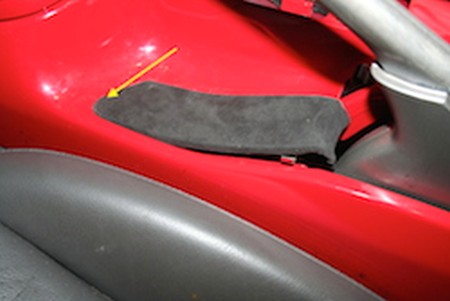
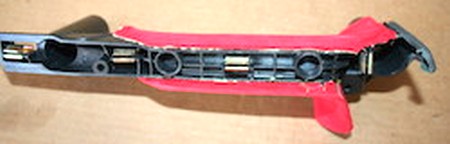
5. Remove the pad (blue arrow) from the brake by siding the trim tool underneath and prying it up. The pad is held into place by means of a channel that the brake body fits into. Alternatively, you can also slide the pad toward the back to remove, although installing that way won't work. |
 |
|
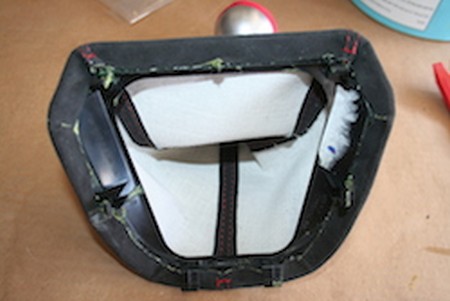
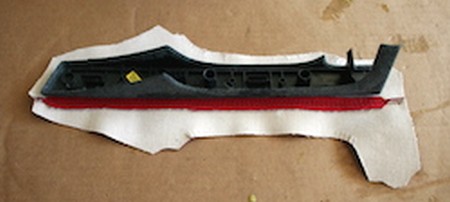
6. Remove the cover by peeling it starting from underneath. Be careful not to tear the foam under that cover, since it may adhere to the cover. Align the material to the pad, paying special attention to the circular cut at the front end. Mark it in pencil if necessary. |
 |
|
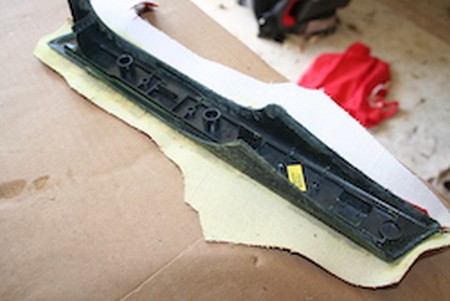
7. Apply adhesive to both the material and the pad. Be sure to follow the manufacturer's instructions... avoid the temptation to attach the parts early. Lay the pad onto the fabric and roll the fabric around the edges, and using a razor knife, cut the excess material away. |
 |
|
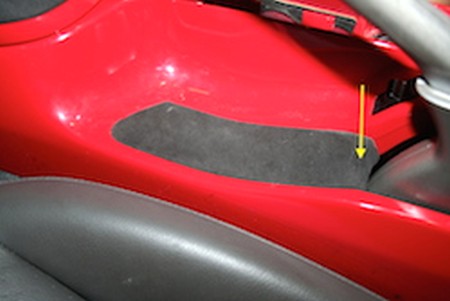
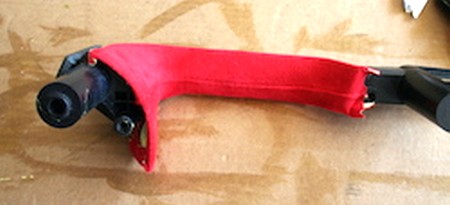
8. When dry, attach (yellow arrow) by sliding the front underneath the handle and pressing down firmly along the entire length until it snaps into place. |
 |
|
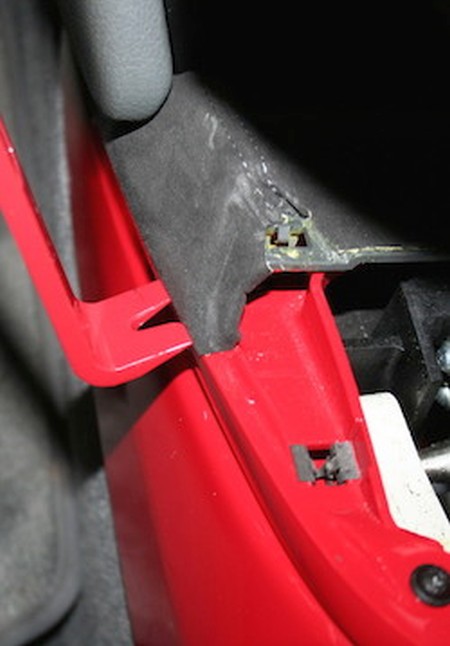
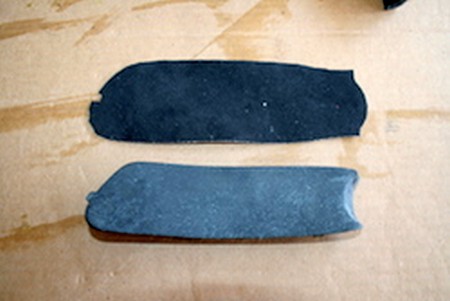
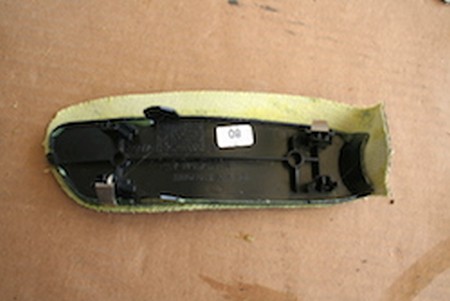
9. Remove the banana (blue arrow) from the console by siding the trim tool underneath the back (the side closest to the brake) and prying it up. Remove the cover by peeling it starting from underneath. |
 |
|
10. Use acetone and sandpaper to clean off any material that may cause bumps when you removed the cover. |
 |
|
11. Align the material to the banana, paying special attention to the little tab in front. If the material bunches around the corners, use scissors to cut a small piece of the corner off so that it fits the way you want it to. For inside corners, the material should already be cut so that it can flex. You may need to deepen the cut if it does not lay the way you want it to. Feel free to trim excess material, but don't cut too much. Apply adhesive to both the material and the pad. Be sure to follow the manufacturer's instructions... avoid the temptation to attach the parts early. Lay the banana onto the fabric starting with the tab. |
 |
|
12. You can use the blunt part of the trim tool to rub the top of the fabric evenly. Then, roll the fabric around the sides. With a razor knife, cut the excess material away. |
 |
|
13. When dry, attach by (yellow arrow) sliding the tab into the slot in the console ... |
 |
|
14. ... then rotating it down and snapping the back down into place. |
 |
|
ARMREST COVER |
 |
|
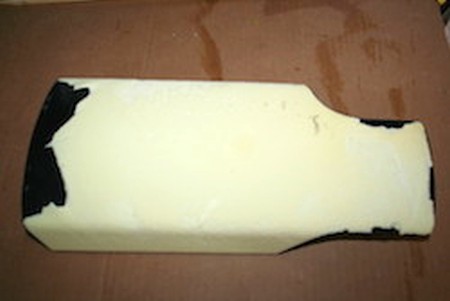
2. Carefully remove the cover, but be careful not to damage the underlying foam. In the ends, it gets very thin and will likely stick to the cover. |
 |
|
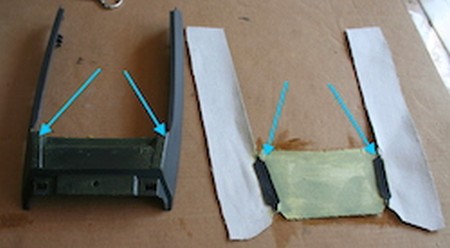
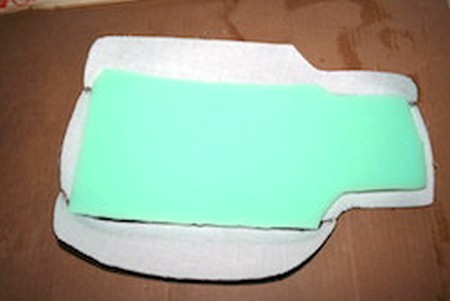
3. If the foam becomes damages, or you'd like extra padding, cut a piece of 1/2 inch foam to fit as shown. |
 |
|
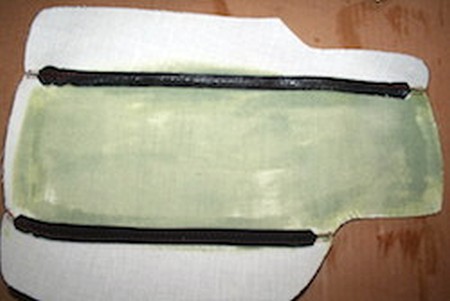
4. Apply glue to the material and the foam. Follow the manufacturer's instructions. Attach the foam to the material, then apply glue to the material/foam and the lid. |
 |
|
5. Attach the material to the lid and wrap around the edges. If the coverns do not fit right, not to worry, allow it to dry. |
 |
|
6. Peel back the corners that need to be reworked. |
 |
|
7. Trim the corner off and reglue. |
 |
|
8. Attach the corner back to the bin, working it around the corner. Apply pressure with the blunt end of the trim tool, if necessary. |
 |
|
9. Once dry, attach the lid to the bin by reattaching the 8 T-10 screws. |
 |
|
DOOR ARMREST COVERS |
 |
|
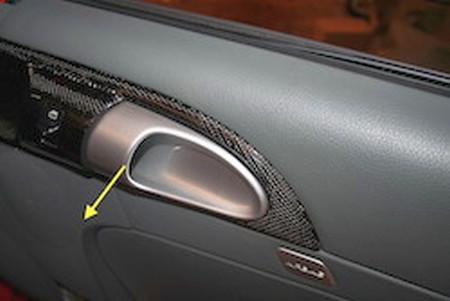
2. Remove door handle pull by pulling to open position, then remove the screw behind the handle using the Torx T-20. |
 |
|
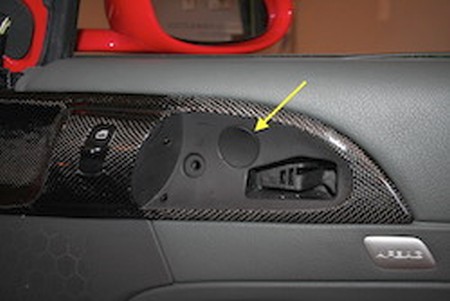
3. Remove round bolt cover cap by prying under it with a micro screwdriver. |
 |
|
4. Insert Trim removal tool to front of door handle and pry to remove outer cover. It is held in by 4 clips. |
 |
|
5. Remove door trim cover to expose screw under latch side of door panel. |
 |
|
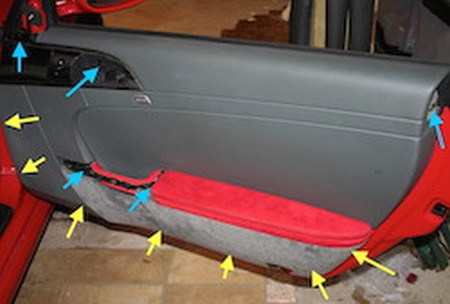
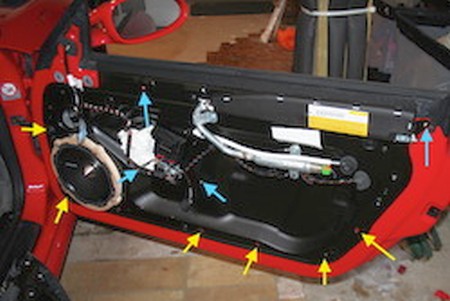
6. To remove the panel, remove the (5) Torx T-27 screws which are now exposed (1 at the door spear, 1 under the mirror triangle, 1 at the rear latch side, and 2 under the outer handle trim... blue arrows) and clips along the bottom edges of the door panel (yellow arrows). The clips are removed by prying with trim removal tool. It will require a bit of force. |
 |
|
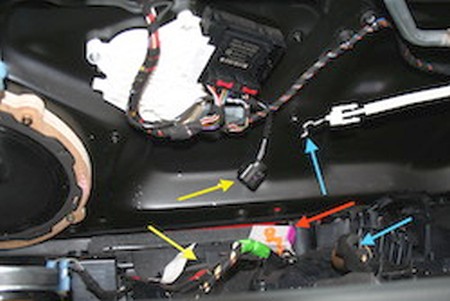
7. Lift up on the door panel and unclip the wiring (a connector along the bottom (yellow), a connector at the top, and a main connctor in the middle(red)). Detach the door lever mechanism (blue arrow). The door panel should now be free to remove. |
 |
|
8. On the back of the door panel, remove 2 Torx T-27 bolts holding the door handle in place (blue arrows). Remove the handle from the door panel. |
 |
|
9. Remove the material from the door handle. Using sandpaper, clean off any fibers, then apply glue per manufacturer's recommendation on one half of the handle. Apply glue to the corresponding half of the material. Rather than glueing the entire thing at one time, it makes it more manageable to do one side, then fold up and do the other. |
 |
|
10. Align the material's seam to the channel groove (which the seam slides into) on the door handle, and attach the one side. |
 |
|
11. Apply glue to the other side of the handle and material. |
 |
|
12. Tuck in all sides and smooth out and creases. |
 |
|
13. Finished Door Handle |
 |
|
14. Remove the material from the outer door handle. Align the material to the handle to get an idea of how the pieces fit together. Pay special attention to the seam. The seam should align with the top corner of the handle (see photo 17). |
 |
|
15. Using sandpaper, clean off any fibers, then apply glue per manufacturer's recommendation. Apply glue to the material. You may choose to apply glue to the material and part in sections to make glue up easier. For example, apply glue to the flat part, then around the edges. |
 |
|
16. Apply glue to the remainder and wrap the material around all sides. Trim off excess from corners as needed. |
 |
|
DOOR ARMREST COVERS |
 |
|
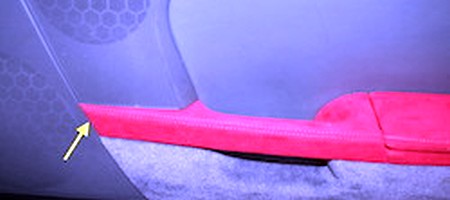
18. Glue can be found on one part of the backing. It is necessary to slowly pry in this area to not break the plastic door bin backing. There are also 2 clips on both ends which are much easier to remove. |
 |
|
19. When reapplying, add glue to surface to replace OEM adhesive. Reassemble reversing steps 17 and 18 above. |
 |
|
20. Reattach the wiring (a connector along the bottom (yellow), a connector at the top, and a main connector in the middle(red)). Attach the door lever mechanism (blue arrow). The door panel should now be free to remove. |
 |
|
21. To install the panel, attach the (5) Torx T-27 screws (1 at the door spear, 1 under the mirror triangle, 1 at the rear latch side, and 2 under the outer handle trim... blue arrows) and clips along the bottom edges of the door panel (yellow arrows). The clips are removed installed by pressing down in the appropriate location. If any clips have been damaged in removal, replace. The clips function by expanding when collapsed. |
 |
|
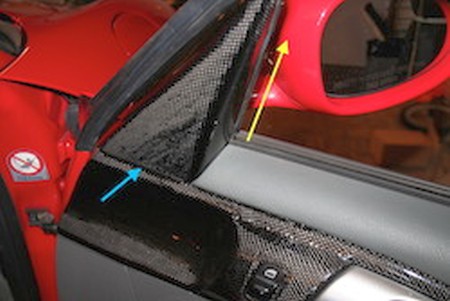
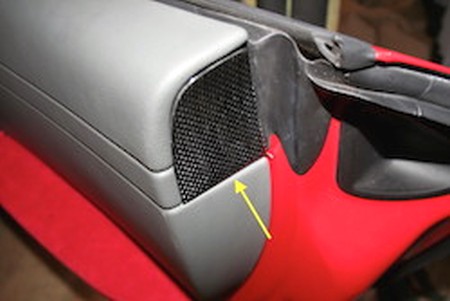
22. Slide the top of the triangle onto the upper guide upper mirror triangle (yellow arrow) and press to engage the lower clips (blue arrow). |
 |
|
23. Install the door handle puling to the open position, then installing the screw behind the handle using the Torx T-20 |
 |
|
24. Snap in the round bolt cover cap. |
 |
|
25. Install the door trim cover under latch side of door panel by snapping the 2 clips into their respective locations. |
 |
|
26. Insert the outer door handle cover onto the inner handle. It is held in by 4 clips. |
 |
|
Useful tip You have installed a product made out of genuine leather. As you know, to maintain a leather product in good condition, you should take care of it. We suggest occasionally (every 4-6 week for example) applying some leather conditioner/UV protector to keep your leather from drying up in the sun and cracking. |
|
Subscribe to our newsletter to get an instant 20% discount!