Installation of the steering wheel wraps is quite simple, in fact, although definitely doesn't appear so. But if you follow this write-up you will see that indeed, technically, it is quite simple. Here shown on a Pontiac GTO, but the same principles apply with minor differences to all vehicles.
Please watch the instructional videos from RedlineGoods if you haven't done so already, which will explain how to lace the new wrap on the steering wheel. Find them here.
DISCONNECT THE BATTERY BEFORE STARTING! and let it sit for a minute or two so the airbag system powers down completely. Failure to do this could result in the airbag deploying in your face when you remove it!
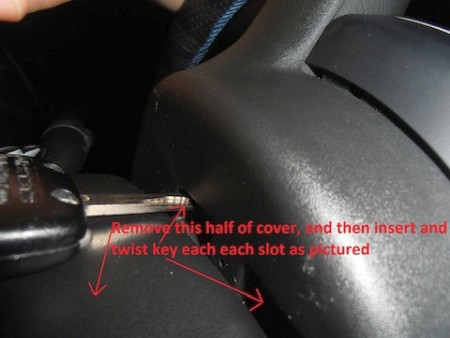
To begin uninstalling the GTO steering wheel, the airbag must be removed first. To do this, remove the top half of the steering column cover. It should unsnap fairly easily and pull out. Next, turn the steering wheel sideways with the Pontiac arrowhead on the airbag pointing directly toward either door (this will require the key partially turned in the ignition to disengage the steering wheel lock). There will be four slots on the back side of the steering wheel cover, two of which are now exposed above the top of the steering column. Now, take the ignition key and insert it into one of the holes. Twist it until you feel it make a slight 'pop' releasing part of the airbag module. Repeat with the other exposed slot. Now that one side of the airbag is released, turn the steering wheel 180 degrees to expose the other two slots. Repeat the steps above with the ignition key to fully release the airbag.
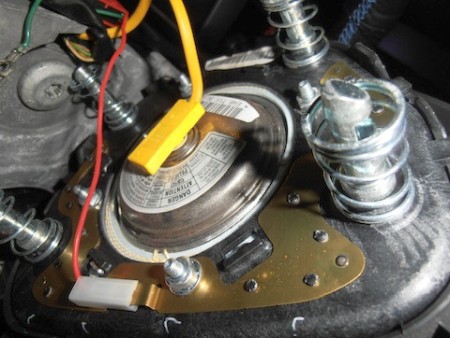
Unplug the two plugs connected to the airbag and set aside.
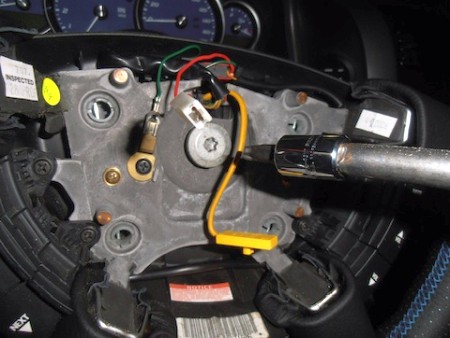
Next, the steering wheel itself needs to be unbolted. This requires a Torx-45 socket. Unplug the wire that connects it to the car and pull the steering wheel straight out as you feed the wire through the slot it goes through in the rear plastic cover of the wheel. It is now ready to be stripped in preparation for installing the new wrap.
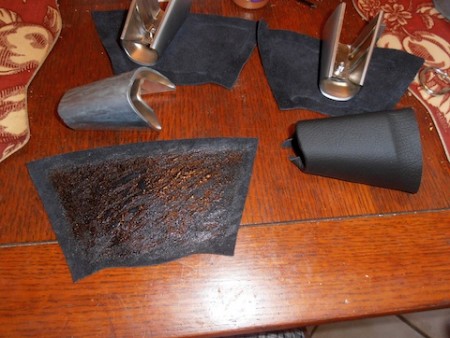
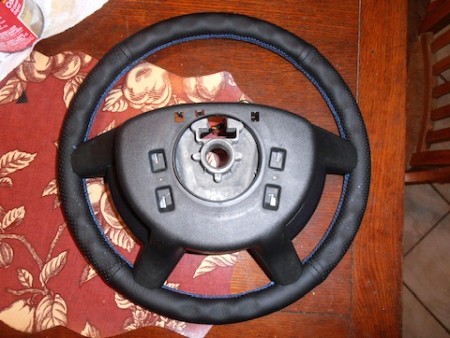
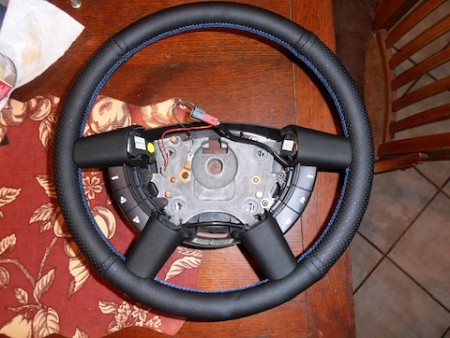
Remove all screws in the picture below. Next flip the wheel on its face and pull off the back cover. Remove steering wheel controls which were also unscrewed. Flip the wheel back over and remove the 4 plastic spoke covers which are each held in by one screw and slide right off after it is removed. The wheel is finally stripped bare and ready to have the old cover removed and new one installed.
To cover the spokes, I used DAP Weldwood contact cement, which worked extremely well. I thoroughly covered the leather pieces with several coats of it using a painters brush until it had a shiny glaze to it. I applied a single coat to the surface of each spoke since they are non porous. After 10-15 minutes I carefully stuck the leather pieces to the outer surface of each spoke. Then I coated the edges in glue and rolled them over. I stuffed the ends that face the airbag down into the slots and on the ends that face the wheel I simply rolled them over as well and trimmed some of the excess. It does not have to be perfect on the rear since it cannot be seen and there is enough tolerance on the wheel to allow it to fit with the excess leather (to an extent) on the backside.
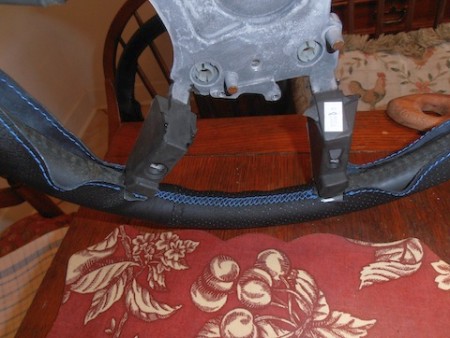
Lace the wheel up, one section at a time, make sure it's aligned properly at all times! This will take some time but is not hard to do, just tedious.
Once you're finished with lacing and aligning the wheel properly, reinstall the spoke covers, the back panel.
Reinstall the wheel in the car, make sure to connect all electric plugs correctly! Reinstall the airbag. Reconnect the battery.
ENJOY!!!!
Useful tip
You have installed a product made out of genuine leather. As you know, to maintain a leather product in good condition, you should take care of it. We suggest occasionally (every 4-6 week for example) applying some leather conditioner/UV protector to keep your leather from drying up in the sun and cracking.
Redline Automotive Accessories Corp. will not be held liable for any labor, incidental or consequential damages of any kind. Proceed at your own risk.