1998-01 KIA SEPHIA |
||||||||||||||||||||
|
Tools needed: #2 Philips screwdriver; 10mm socket, ratchet and extension; glue such as 3M Spray Adhesive; hot glue gun; flat screwdriver; awl or hammer and nail
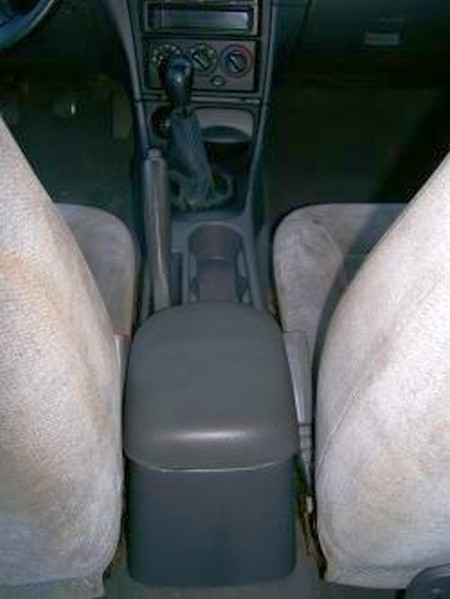
1. This is what the interior of your car should look like when you start. Remove the ashtray, unscrew the shift knob, and make sure the parking brake is fully engaged (for clearance). |
|
|
2. Using a Philips screwdriver, remove the five (5) screws indicated by the red arrows. One is inside the ashtray recess. Then, use a 10mm socket and extension to remove the two bolts located under the felt insert inside the console compartment at the rear. Lift the console from the rear and over the parking brake lever, then pull it backward until you have enough space to unplug the cigarette lighter. Remove the entire console assembly. |
 |
|
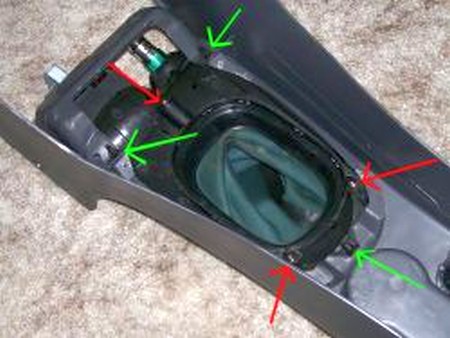
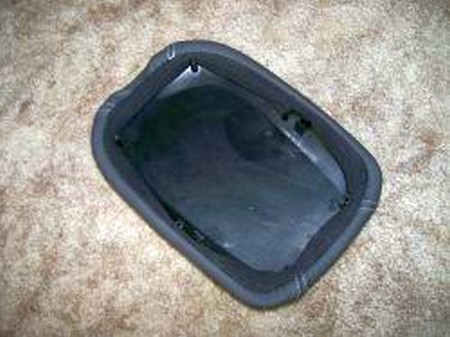
3. To remove the shift boot, use a Philips screwdriver to remove the three (3) screws indicated by the red arrows. You will also want to remove the entire black insert by squeezing the tabs indicated by the green arrows. At the right of the picture you can see the rubber dust guard around the parking brake slot. Remove this by pulling straight up. The plastic “heads” on the pegs that hold it will break off. If they do not, remove them with a knife or screwdriver. Leave the pegs themselves intact.
|
 |
|
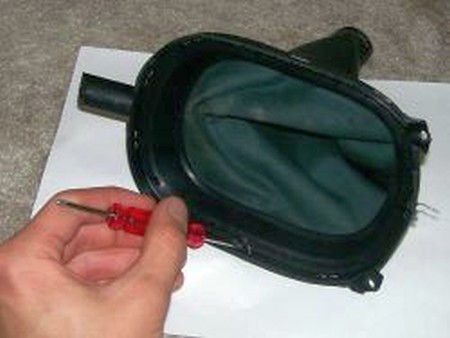
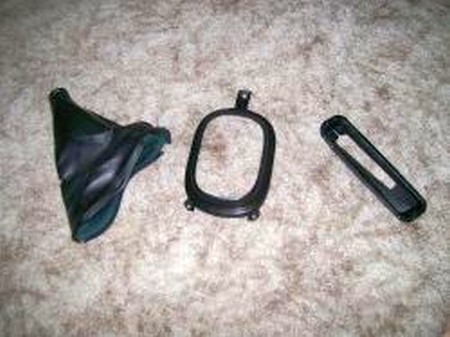
4. Using a small screwdriver, gently unbend the staples that hold the shift boot to the ring. The ring will probably be cracked around the staples, so be careful. |
 |
|
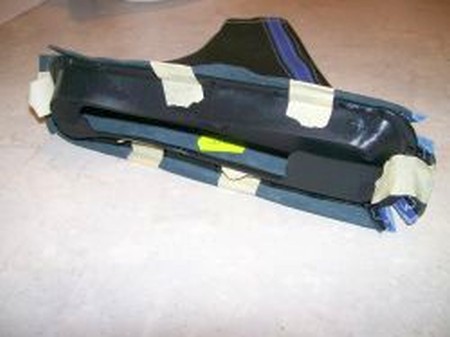
5. When you have removed all the parts, you should have the shift boot, trim ring, and dust guard as shown. |
 |
|
6. Use tape to attach the dust guard to the new parking brake boot as a template (make sure it’s properly oriented front to back). Use an awl or a hammer and nail to punch holes in the boot just like the holes in the dust guard. When you’re done, remove the dust guard (you may discard it) and enlarge the holes with a screwdriver shaft. |
|
7. Apply a glue such as 3M Spray Adhesive (works very well) and then quickly but carefully push the boot into place on the pegs, using a flat screwdriver blade to wedge the leather down around the pegs. If you get adhesive residue on the outside of the boot (easy to do), use a cleaner such as Goo Gone to remove it before it dries. Optionally, use a hot glue gun to replace the “heads” that you broke off the pegs earlier. This secures the boot better.
Use more spray adhesive to coat the shift boot ring and then carefully press the boot around it, flush with the bottom edge. When dry, reinstall the trim ring into the black console insert and replace the screws. |
 |
8. To install the armrest cover, remove the six (6) screws in the bottom of the lid and then wrap the cover around the lid as shown, tucking the elastic between the screw holes and the lip of the lid. Replace the lid and screws, trapping the cover in place. |
 |
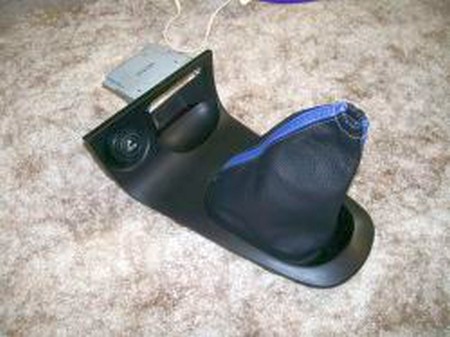
9. Replace the console in reverse order from how you removed it. Don’t forget to plug in your cigarette lighter! Replace the bolts and the four (4) screws from the outside of the console, but not the one inside the ashtray!
Scrunch the parking brake boot down around the handle until it is very tight. Raise and lower the lever a few times to make sure it has adequate slack; use more Goo Gone to remove any adhesive visible around the edge.
The picture shows the console before the insert is replaced.
Shift into 4th gear and slip the insert and boot into place over the shift lever. Replace the ashtray screw and the tray itself, then screw the shift knob down and slip the boot over the lip at the bottom edge. Your new boots are installed! |
 |
|
CONGRATULATIONS - YOU HAVE SUCCESSFULLY INSTALLED YOUR NEW LEATHER BOOTS!
Useful tip You have installed a product made out of genuine leather. As you know, to maintain a leather product in good condition, you should take care of it. We suggest occasionally (every 4-6 week for example) applying some leather conditioner/UV protector to keep your leather from drying up in the sun and cracking. |
|
Subscribe to our newsletter to get an instant 20% discount!