1992-98 SUBARU IMPREZA |
|||||||||||||||||||
|
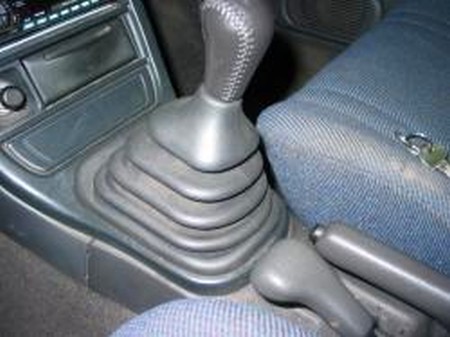
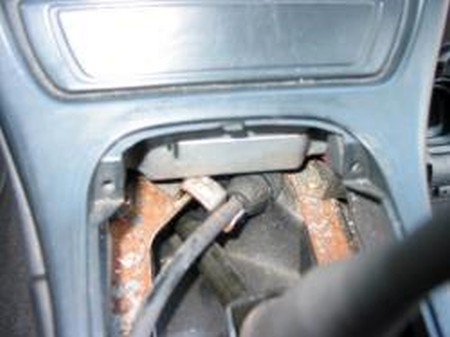
1. This is what you should be looking at. Remove the shift knob. Just twist it off. |
|
|
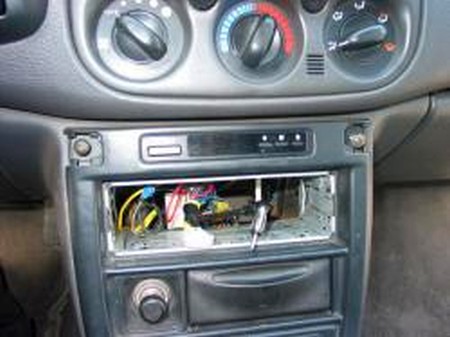
2. Remove the trim pieces above the radio and take out the screws underneath them. |
 |
|
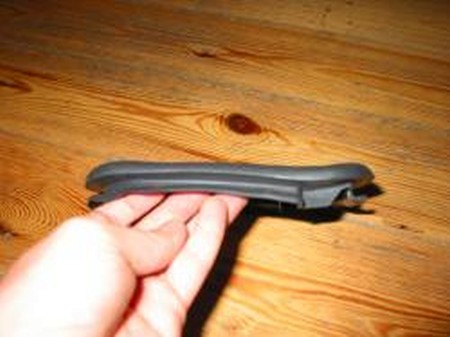
3. If you move your stock rubber boot backwards, these two screw holes (most probably you will have screws in them) will show. Remove the two screws. Now you can remove the whole front console piece and install the shift boot between the stock rubber one (covering it completely) and the console.
We do recommend, however, taking a sharp knife and cutting the stock rubber boot just above the first fold. This will work to stretch the leather boot outwards and making it keep the shape at the bottom while allowing it to move freely above the cut rubber boot. It looks 10 times better that way.
As for the top of the shift boot, you can mount it with a zip-tie from underneath (by flipping the boot inside-out, securing with a zip-tie to the shift lever and then pulling it back down together with the center console). Not too comfortable, but totally doable. |
  |
|
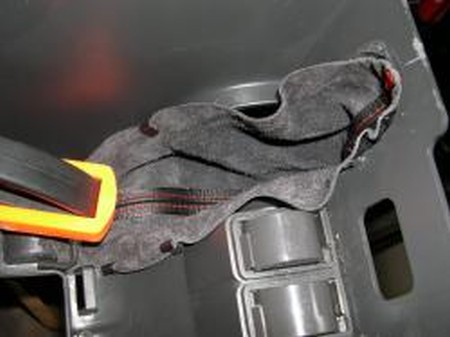
4. To install the ebrake boot remove the screw in the hollow in the back of the center console... |
 |
|
5. ... then remove the two screws, one on each side. Some 92-98 consoles don't have screws and are installed with fasteners. If that's the case, just pull it gently and it will come off. |
 |
|
6. Make sure to remove all electrical connections as soon as you can access them. To get at the stock boot remove the cup holder, and then using small piers and a flat head screwdriver remove the fasteners that hold on the stock boot, carefull not to loose any. |
|
|
7. Install the new boot by using first the fasteners (you might have to straighten them with a hammer if they got crooked while being removed) and glue for added hold. |
|
|
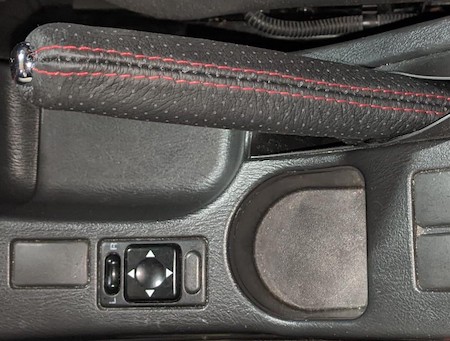
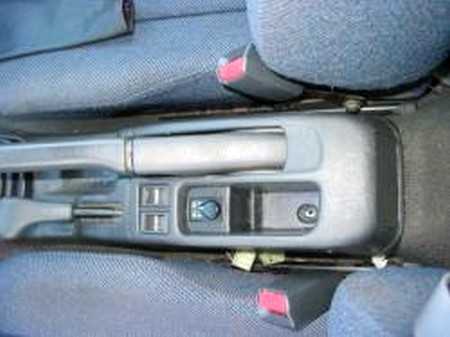
8. Reinstall the cup-holder. This is what your console should look like. Put it back in the car and you're done! |
|
|
REINSTALL EVERYTHING AND... CONGRATULATIONS - YOU HAVE SUCCESSFULLY INSTALLED YOUR NEW LEATHER BOOTS!
Useful tip You have installed a product made out of genuine leather. As you know, to maintain a leather product in good condition, you should take care of it. We suggest occasionally (every 4-6 week for example) applying some leather conditioner/UV protector to keep your leather from drying up in the sun and cracking. |
|
Subscribe to our newsletter to get an instant 20% discount!